Integrate Brekeke RFS with CallMiner
Requirements:
- Brekeke RFS Version 2.7.5.8. 12654 or later
- Speech-to-text option in the RFS license
Note:
- The settings of Speech-to-Text can be made at each tenant menu or at whole system menu (Main Menu). Here, as an example, the following instruction introduce the way at system menu (Main Menu).
- Because the following screenshots in instructions are captured from the beta version, the description of each field may vary in the future version.
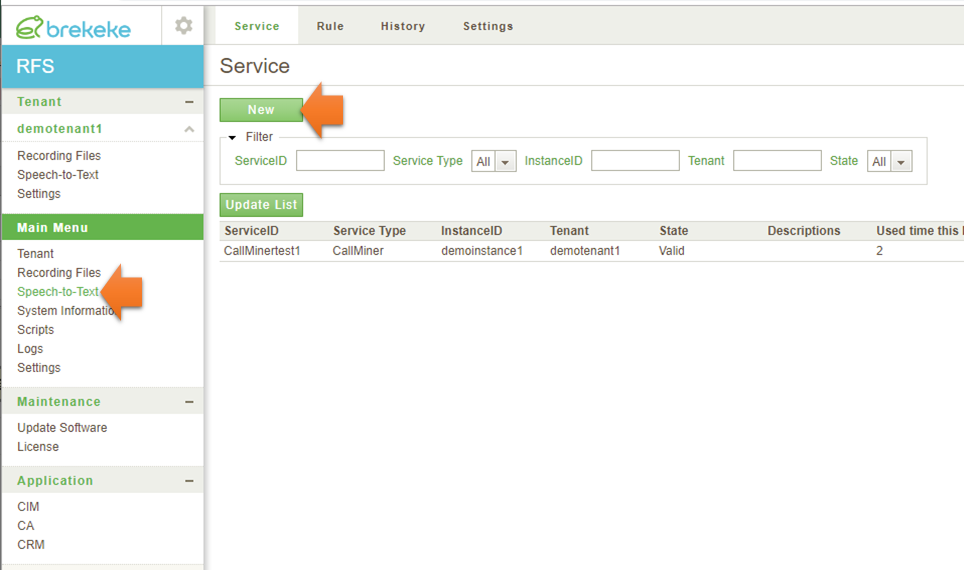
Step 1. Create a service
In Brekeke RFS admin tool, move to the [Main Menu] > [Speech-to-Text] > [Service].
Click the [New] button.
Step 2. Create a service
Enter a Service ID, and select a Service Type. Here, for example, select “CallMiner” as a service type.
Credential field is automatically displayed. Enter your credential.
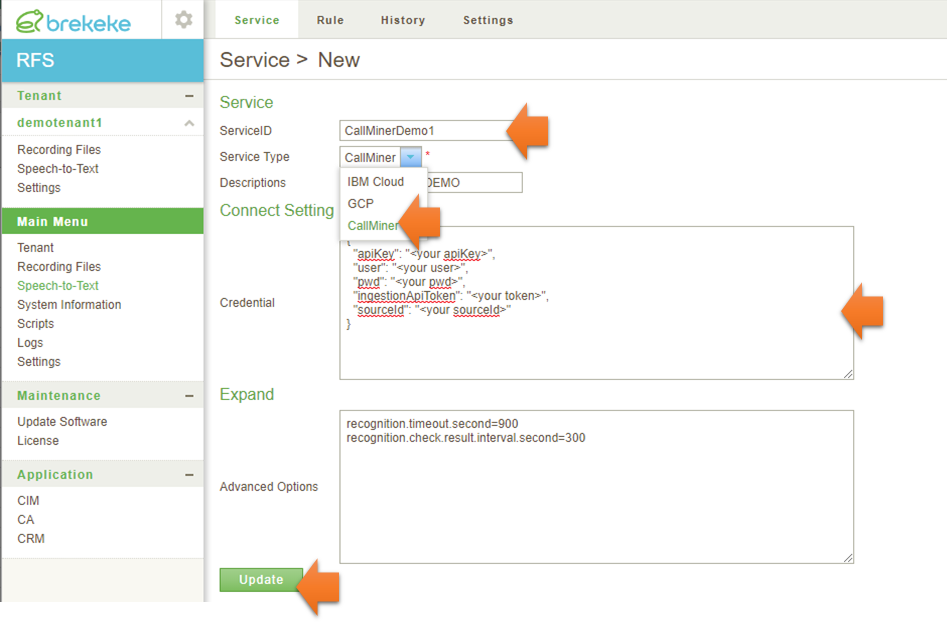
Click [Update] button.
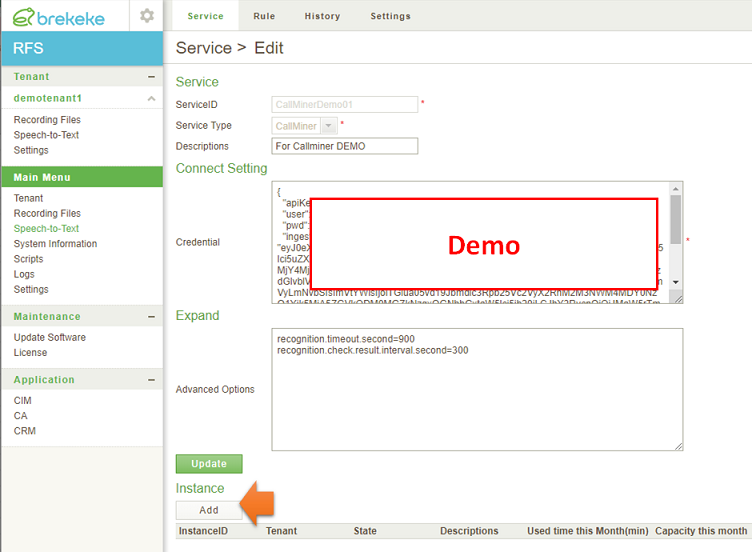
Step 3. Create an instance
After saving a service, the [Instance] section is displayed.
Click [Add] button.
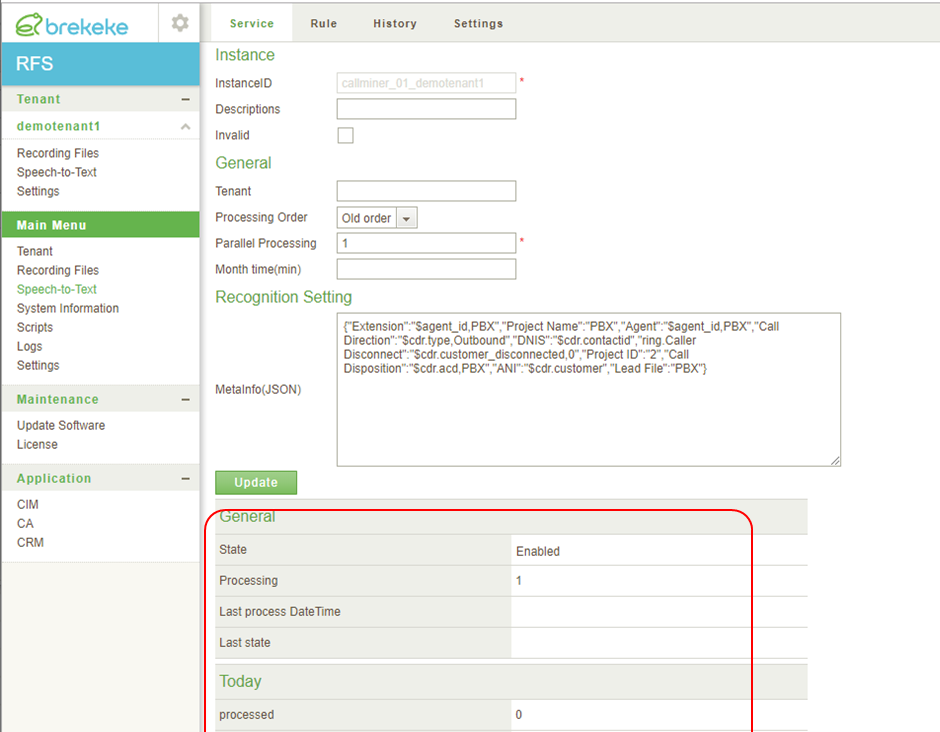
Step 4. Edit the instance
*1 . If you want to use this instance in an unique tenant’s [Speech-to-Text] menu, set tenant name. If you want to use this instance in system’s [Speech-to-Text ] menu, you do NOT set tenant name.
*2. You need to set a number that is equal or bigger than 1.
*3. You can set the limitation of usage for a month. For example, in the case you set “100”, if the accumulated total service using time reaches 100 mins, RFS doesn’t use the service and returns the error result.
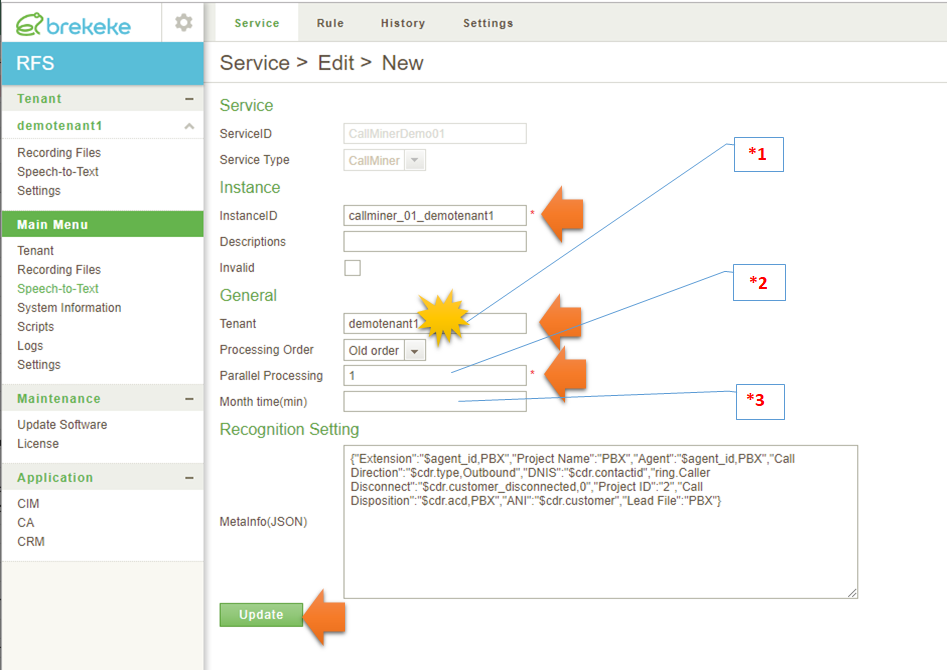
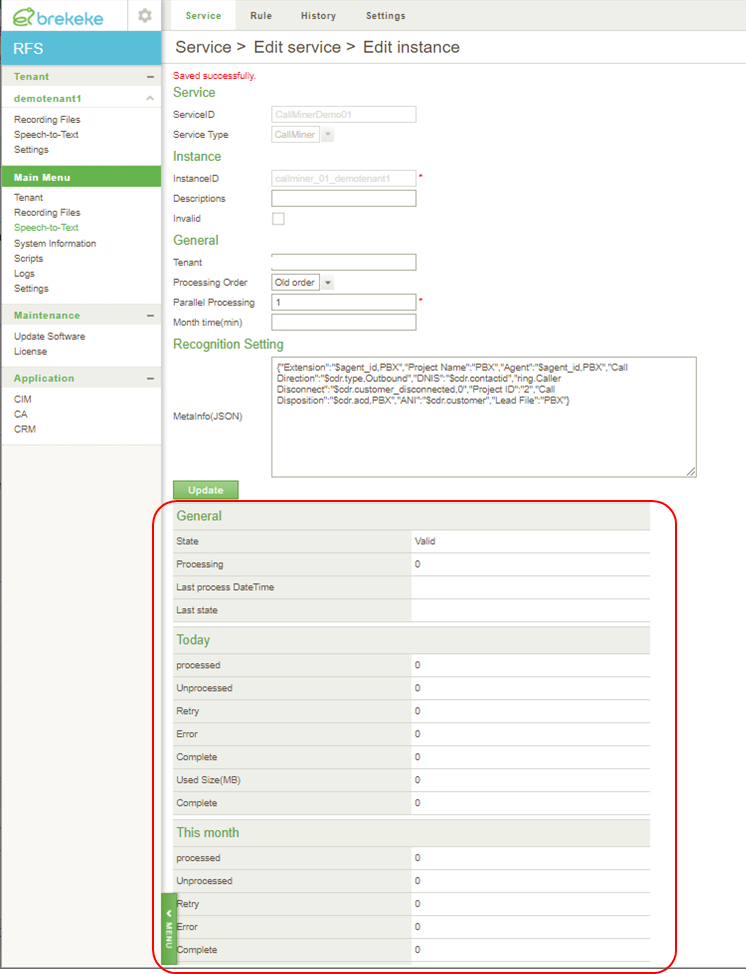
Click [Update] button.
The status section of the instance is displayed.
Step 5. Create a rule group
Click a [New] button at [Main Menu] > [Speech-to-Text] >[Rule] page.

Enter the [RuleGroupID] and [Tenat] .
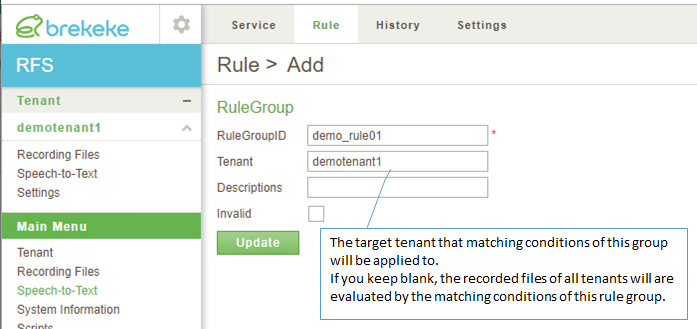
Click a [Update] button.
Step 6. Add rules to the rule group
Click [Add] button. Enter the RuleID.
Set Conditions. If you set nothing, all recording files of the tenant are processed and sent to the Speech-to-text service.
Select Instance. If you can not select any Instance, please go back to the step4, and check if the [tenant] field is blank.
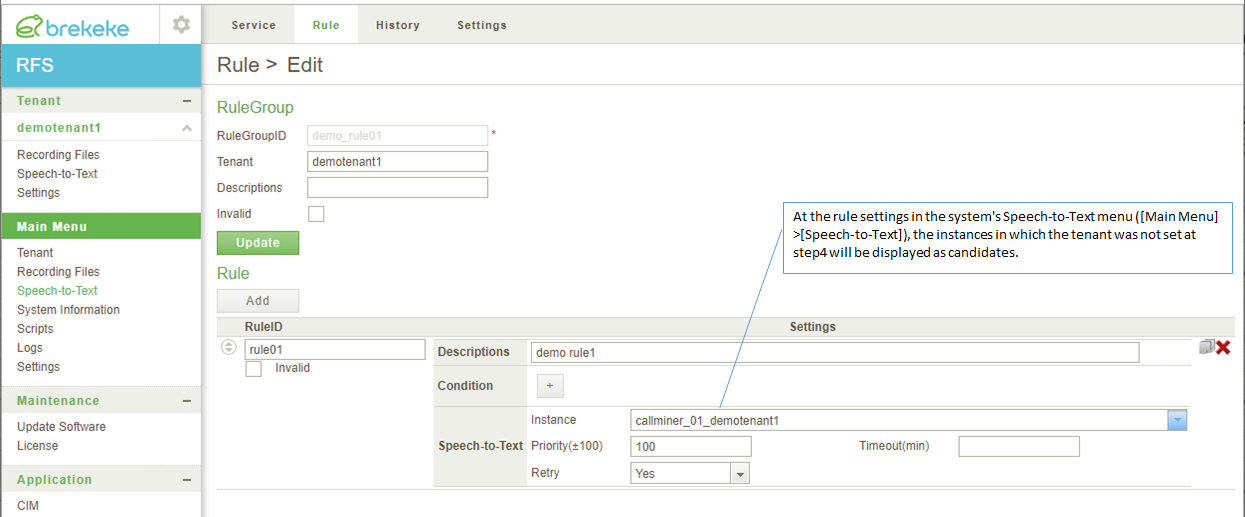
* We recommend “Retry=No”.
Operation test
Note:
Check if CDR server in Brekeke CA is running.
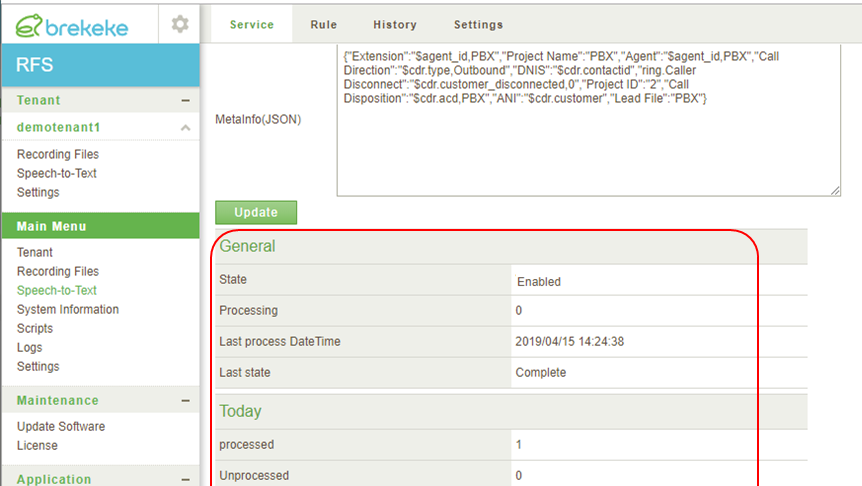
1. Check current Status
After agent’s talking, if recording file matches with the rule, the file is sent to Speech to text service.
You can see the status like the following picture.

A few minutes later.
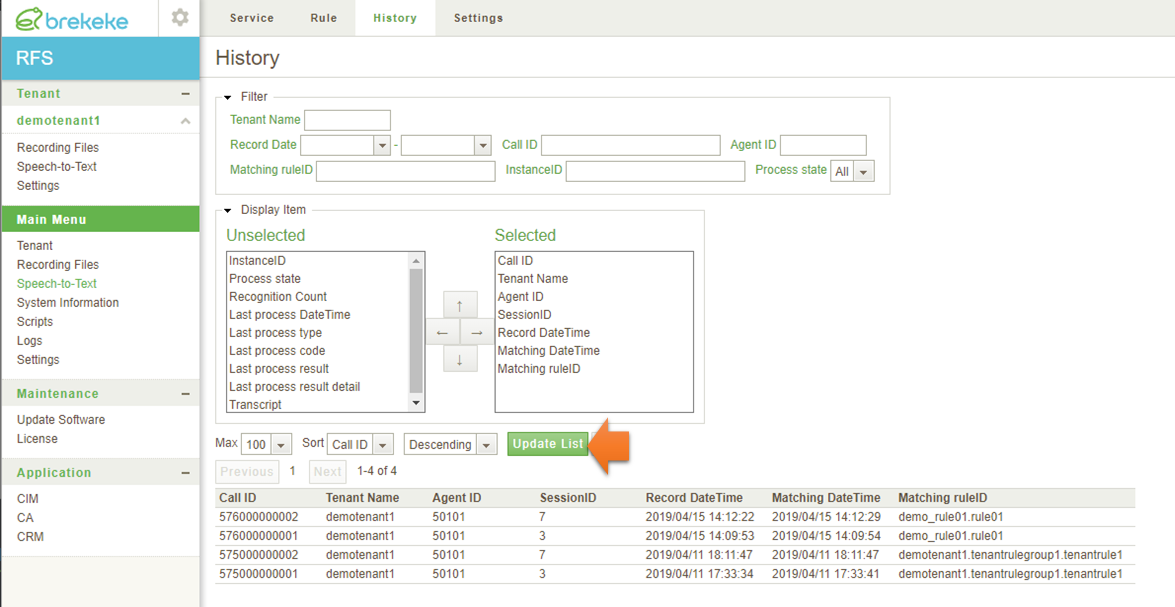
2. Check the History
Move to the [History] page, and click the [Update List] button.