
Clearbox Radius
ClearBox Radius With Brekeke SIP Server
Abstract
This manual describes how to quickly setup a ClearBox Server with Brekeke SIP Server Authentication and Accounting. If you have more questions about detail configurations on the ClearBox Radius Server, please contact ClearBox technical support: http://www.xperiencetech.com/support/techsupport.asp
General Setup of ClearBox
Visit Xperience Technologies website and download the ClearBox RADIUS TACACS + Server.http://www.xperiencetech.com/download/gettrial.asp
After installing ClearBox, open Server Manager and Configurator.

(Server Manager)
If the server cannot run, please troubleshoot by checking the “Error Log”.
(Configurator)
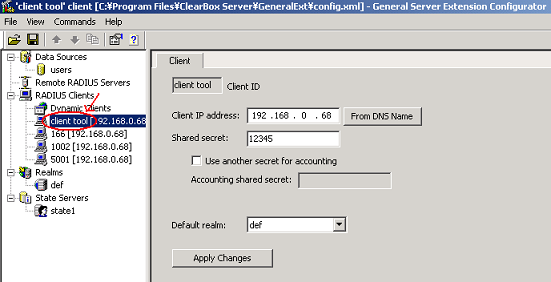
To add a new client:
- Right click on “client tool” and create a new client
- Put Brekeke SIP Server’s IP address in the “Client IP address:” field
- Put the shared secret information on the “Shared secret” field. Please make sure that the shared secret information you put matches the shared secret information in the sv.properties file
Section 1.1 – Authentication
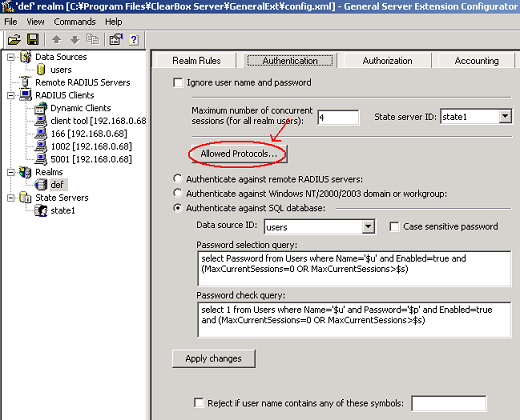
Click the “Allowed Protocols” button to select authentication protocols that are supported by both Brekeke SIP Server and the ClearBox server to authenticate users (ie SIP).
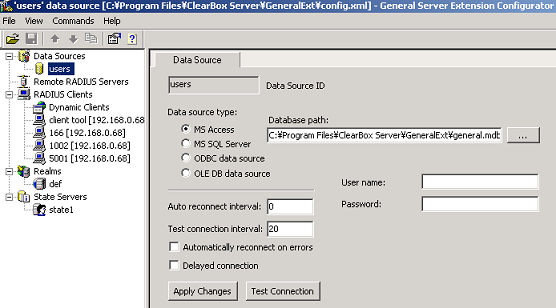
NOTE: You will need to edit client username and password in the Users’ Table (ClearBox_install_dir\ClearBox Server\GeneralExt\general.mdb). Once user information is successfully edited, saved, and refreshed in the file, restart ClearBox service.
REMEMBER: Depending on the type of user agent (phone) you are using, you will also need to set the correct username and password at the user agent’s configuration.
Authentication setup on Brekeke SIP Server
Go to http://www.brekeke.com/download/download_sip_plugin.php and download the Radius Authentication plug-in. Please follow instructions in the readme.txt
- Insert brekeke-sip-auth.jar file into the OSS_install_dir\proxy\WEB-INF\lib directory
- Set the following parameters in sv.properties (OSS_install_dir\proxy\WEB-INF\work\sv)
radius.authport = 1812
radius.acctport = 1813
radius.radiushost = Put_radius_server_IP_address
radius.sharedsecret = Put_shared_secret
net.usrdir.plugins = com.sample.radius.proxy.RadiusAuth
radius.addrealmtouser = false
Restart Brekeke SIP Server service.
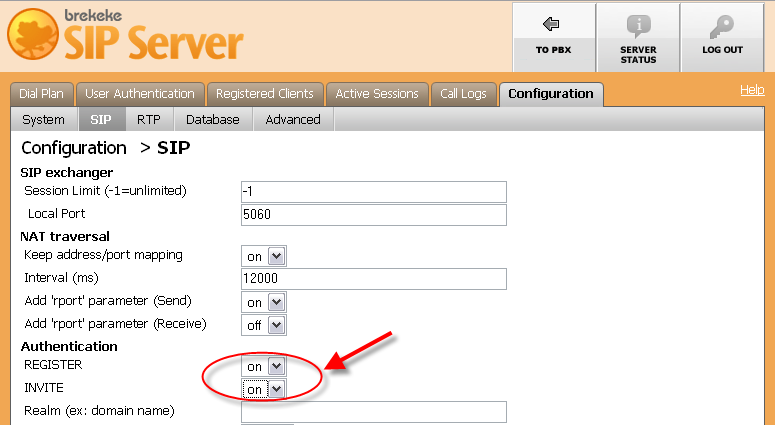
On Brekeke SIP Server Admintool, enable both “INVITE” and “REGISTER” field. Save and restart Brekeke SIP Server service.
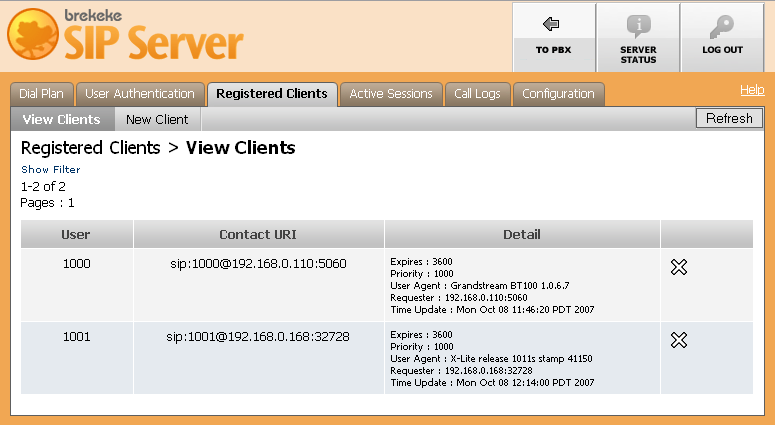
Go to Brekeke SIP Server Registered List and see if clients are display on the list. If so, it means that clients have been successfully registered to Brekeke SIP Server through ClearBox.
Section 1.2 – Accounting
Accounting setup on Brekeke SIP Server
Go to http://www.brekeke.com/download/download_sip_plugin.php Radius Accounting plug-in. Please follow instructions in the readme.txt
- Insert brekeke-sip-acct.jar file into the OSS_install_dir\proxy\WEB-INF\lib directory
- Set the following parameters in sv.properties (OSS_install_dir\proxy\WEB-INF\work\sv)
radius.authport = 1812
radius.acctport = 1813
radius.radiushost = Put_radius_server_IP_address
radius.sharedsecret = Put_shared_secret
Dial Plan
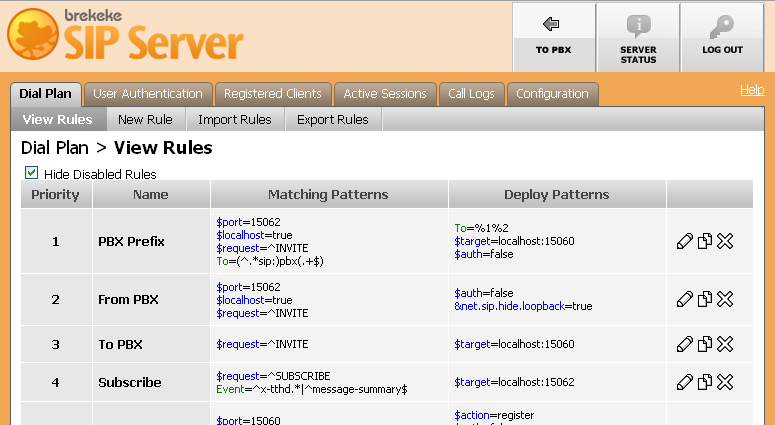
Add the following Dial Plan at the Admintool:
Matching Pattern:
$request = ^INVITE

Deploy Pattern:
$session=com.sample.radius.proxy.RadiusAcct
$continue = true
Restart Brekeke SIP Server service.
Account Settings on ClearBox Server Configurator
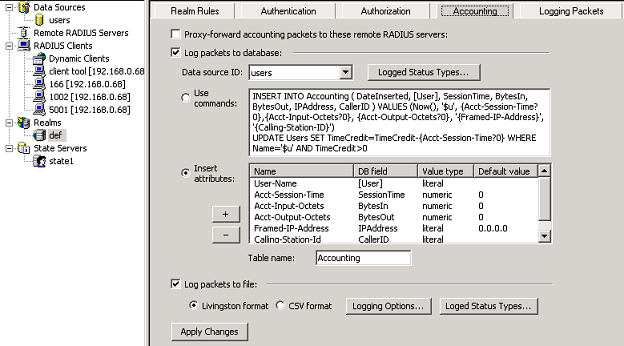
This page allows user to specify which ClearBox Server will work with accounting data. This data contains information about user sessions and connection details, such as traffic details and session duration.
For example, if you click on [Select Accounting Status Types] > [Logged Status Types…], the available accounting status types are now displayed. Account logs are named as acctlogs_xxxxxxxx, located in ClearBox_install_dir\ClearBox Server\GeneralExt
For more detailed information on Accounting settings, please refer to ClearBox Server documentation.