DMZ SIParator, with Brekeke SIP Server on the outside
The following is a sample DMZ network structure.
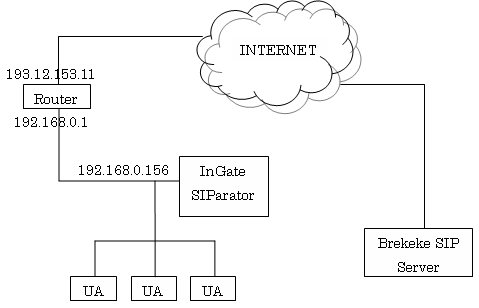
Configure InGate SIParator 4.6.1
Once the IP address is configured, you can access InGate SIParator webpage by http://10.0.0.3/ (example of selected IP address). Please follow the following steps once the webpage is open.
1. Set SIParator Type
Set the SIParator Type as “DMZ” under [Basic Configuration]>[SIParator Type]
2. Network Configuration
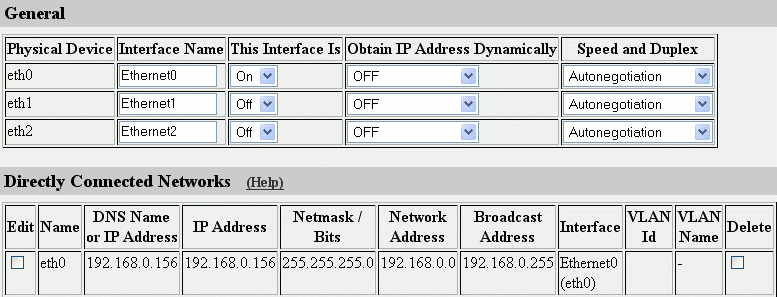
Ethernet interface configuration
Using DMZ configuration, the SIParator works behind NAT. Only one Ethernet is used for internal communication. In the example, we set local IP ’192.168.0.156’ to Ethernet 0. Set at [Network]>[All Interfaces] or [Eth0]
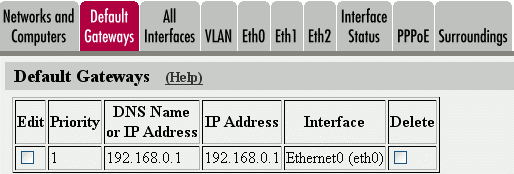
Set default gateways
Define Networks and Computers

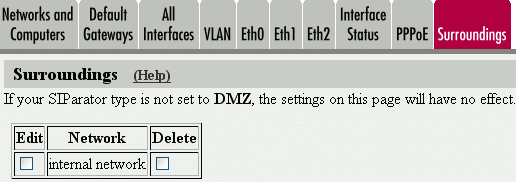
Surroundings
List all networks which the SIParator should serve and which are not reached through the default gateway
3. SIP Configuration
Enable SIP Module
The same as what is done in Standalone SIParator
Set Public IP to the InGate SIParator
Mention the router’s public IP to the InGate SIParator Under [SIP Services] – [Interoperability] -> “Public IP address for NATed SIParator”

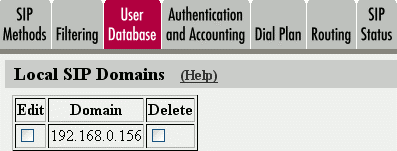
Define local domains handled by SIParator
At [SIP Traffic]>[User Database]
Enter a Proxy rule for processing internal network SIP requests
The same as that in Standalone SIParator
4. Apply Configuration and Save

Save Configuration

Configure User Clients
The SIP user clients should have 10.0.0.3 (the SIParator’s internal IP address) as their outgoing SIP proxy. And Brekek SIP server’s global IP address as their SIP server.
Configure Router
Set port forwarding at the router located between the global network and InGate SIParator.
InGate SIParator SIP port: 5060 (default)
InGate SIParator Media port range: 58024 – 60999 (default)
