

Installation - Brekeke UC
1. Preparation
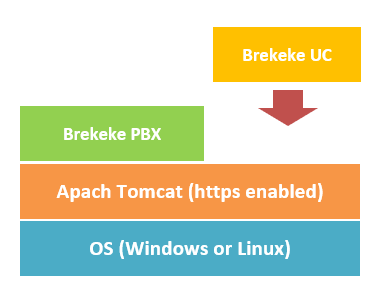
1-1. Install Brekeke PBX
Install Brekeke PBX. Instruction for installing Brekeke PBX can be found at “Brekeke PBX Installation“.
1-2. Enable HTTPS
In order to use audio/video call functions of Brekeke UC, https connection needs to be enabled.
Prepare a certificate and turn on HTTPS connection of Tomcat.
Refer to the “HTTPS” section at the “Setup secure connections (TLS/WSS/HTTPS) with certificate:” page.
1-3. Install Database (UC v1.3.x -)
Install Database product. For requirements of database product, refer to the “Brekeke UC System Requirements“.
For the installation method, refer to the guides and manuals of each database product.
2. Installation
2-1. Install Brekeke UC
1) Stop Tomcat.
2) Put the “uc.war” file on the “webapps” directory under the installed Tomcat’s directory.
2-2. Start Brekeke UC
1) Start Tomcat.
2) Open the “https://localhost:8443/uc/” web page with a browser. (The port 8443 is the default https port of Tomcat. If you run Tomcat with another port, change the port number in the above URL.)
3) The dialog for license activation appears.
2-3. Activate license
1) Enter a product ID in the text box.
2) Click the [Activate] button. Follow the instructions on the screen to complete the activation.
3) Move to the sign-in screen. Both the user ID and password of the system administrator are “sa“.
3. At Brekeke PBX
3-1. Settings on Brekeke PBX
1) Turn on the [WSS-handling] at Brekeke PBX > [SIP SERVER] > [Configuration] > [SIP] > [WSS (WebSocket over TLS)]. And on the [Key and Certificate] section, upload the keystore file which is used for https on Tomcat.
2) Add the following dial plan rule as the highest priority at [SIP SERVER] > [Dial Plan] > [Rules].
<PBX v3.8.0 – v3.8.5> (*1)
Add the following Deploy Patterns to the existing rule “To PBX“.
| Matching Patterns |
| $request = ^INVITE|^SUBSCRIBE |
| Deploy Patterns |
| $pbx.in $rtp = true &net.rtp.replace.ice = false &net.rtp.add.candidate.ice = true |
* 1. If there is the rule “Bypass PBX”, you do not have to add/edit the dial plan rule.
<PBX v3.8.6.x or later>
Any additional dial plan rule is not needed.
3) Create a tenant on Brekeke PBX (Multi-Tenant edition only).
4) If there is no “webrtc” phone type as default at the [PBX] > [Option] > [Phone Type] page, you need to create the new phone type named “webrtc”.
5) Edit the detail of “webrtc” phone type. Set “WebRTC= Yes” and “Stand-alone video client = on” (in case you use the video call feature).
6) Create extension users at [PBX] > ([Tenant] >) [Extensions] > [Users]. These users will be used to log in UC. Select “webrtc” as type at [Phones] page of each extension user’s menu.
4. At Brekeke UC
4-1. Tenant settings (Multi-Tenant edition only)
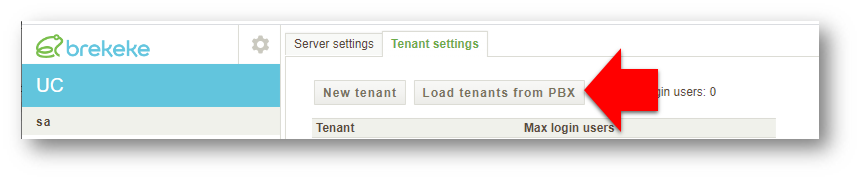
1) Login to UC as “sa” user. Then move to the [Tenant settings] page. Click the [Load tenants from PBX] button to load tenants’ information from PBX.
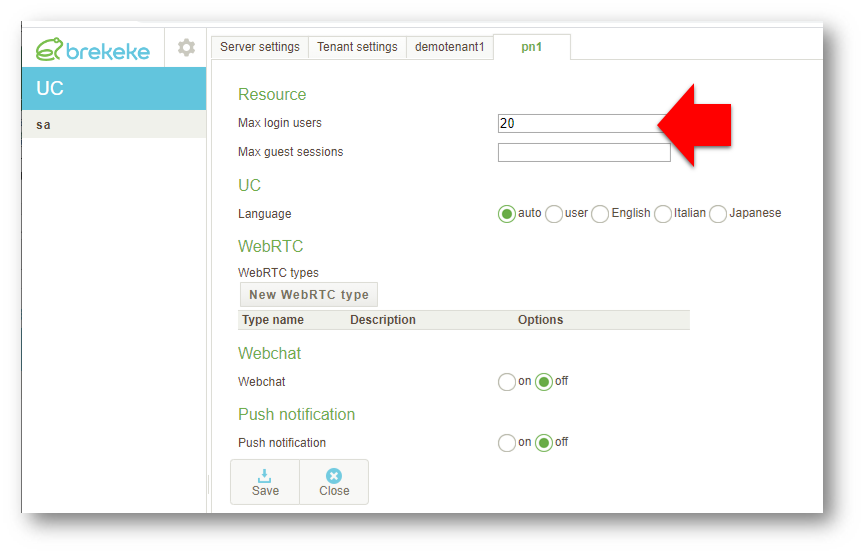
2) Click tenant name to edit details. Then enter the number of max concurrent login users in [Max login users] field.
In this picture, at the tenant “pn1” settings, set “20” at [Max login users].
| Resource | Description |
| Max login users | Maximum number of clients that connect to UC Server. |
| Max guest sessions | Within Max login users, maximum number of guests that connect to UC Server from external (Website, SNS). |
4-2. Network settings
The client of Brekeke UC needs access to Tomcat with HTTPS (generally 8443 port) and also access to PBX with WSS (10081 port). Check that those ports are enabled.
4-3. Login test
Access Brekeke UC with the URL “https://<UC server’s address>:<HTTPS port>/uc/” from remote PCs. Then log in to Brekeke UC with PBX user, password, and tenant.