
Example: Application Connectivities
Assumption:
Service domain – service.brekeke.info
Primary site (r1.brekeke.info)
| Application | Server Name (internal) | Local IP Address |
| Brekeke PBX | r1pbx | 172.16.100.11 |
| Brekeke CIM | r1cim | 172.16.100.12 |
| Brekeke CRM | r1crm | 172.16.100.13 |
| Brekeke CA | r1ca | 172.16.100.14 |
| Brekeke RFS | r1rfs | 172.16.100.15 |
| MySQL DB | r1db | 172.16.100.16 |
Secondary site (r2.brekeke.info)
| Application | Server Name (internal) | Local IP Address |
| Brekeke PBX | r2pbx | 192.168.100.11 |
| Brekeke CIM | r2cim | 192.168.100.12 |
| Brekeke CRM | r2crm | 192.168.100.13 |
| Brekeke CA | r2ca | 192.168.100.14 |
| Brekeke RFS | r2rfs | 192.168.100.15 |
| MySQL DB | r2db | 192.168.100.16 |
<Primary Site>
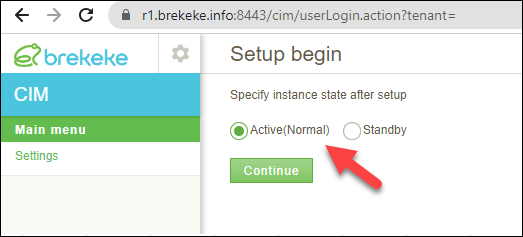
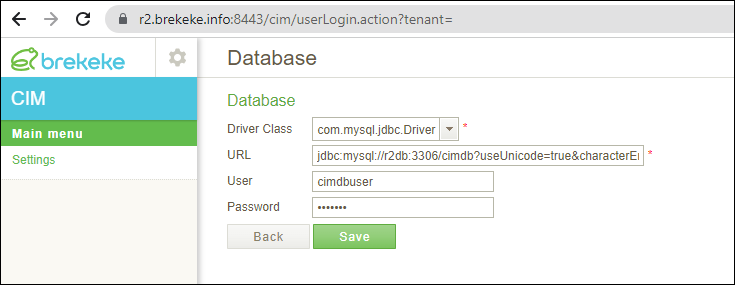
Step 1. On the primary site, select instance state “Active“, then initialize database of each application (CIM, CRM, CA, and RFS).
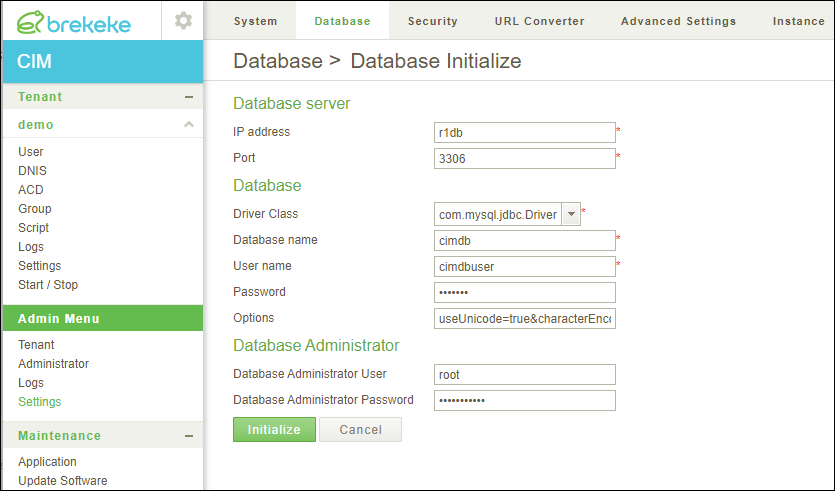
Example: Initialize database of CIM on primary site:
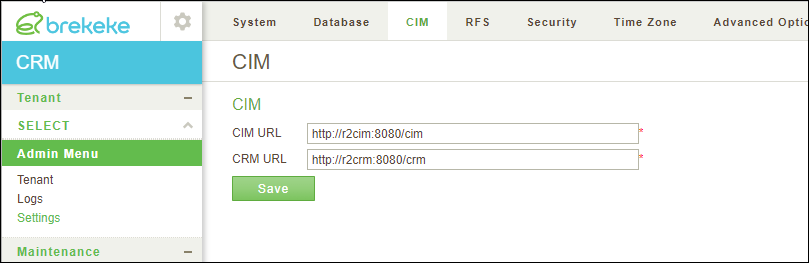
Step 2. Set up internal connection between applcations.
Example: URL for internal connection between CIM and CRM on primary site.
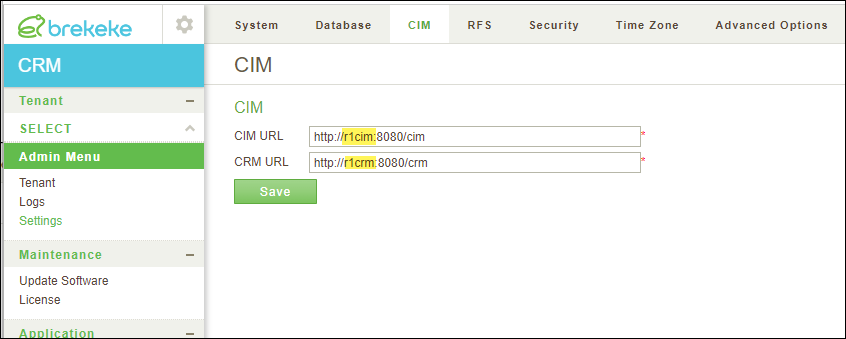
Likewise, configure all connections related to CIM, CRM, CA and RFS.
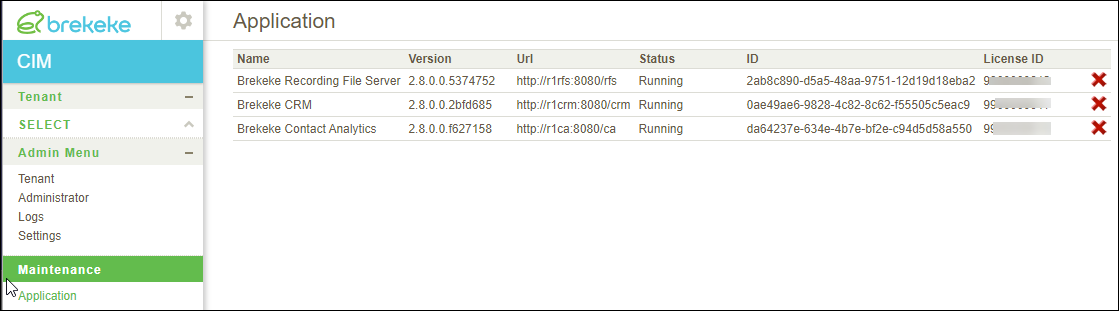
After setup connections, you can check registered Applications at CIM > [Maintenance] > [Application].
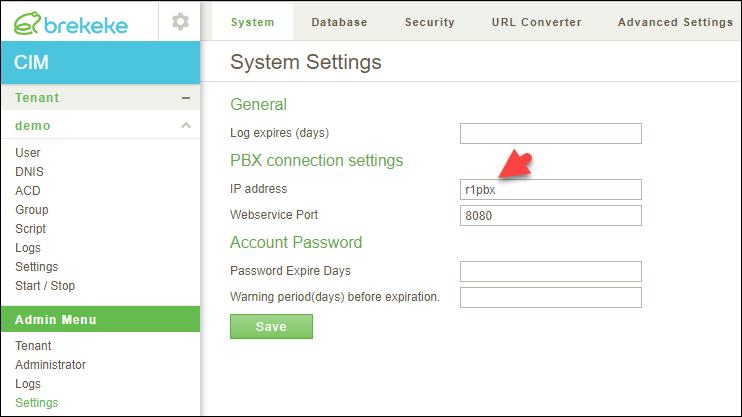
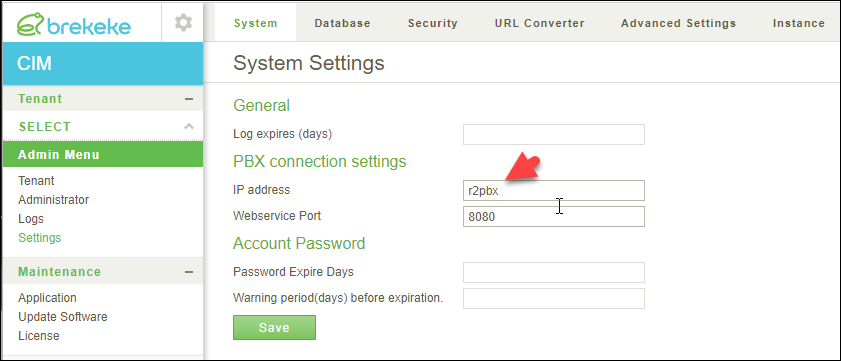
Step 3. Setup CIM-PBX connectivity.
Example: CIM-PBX connection settings on primary site:
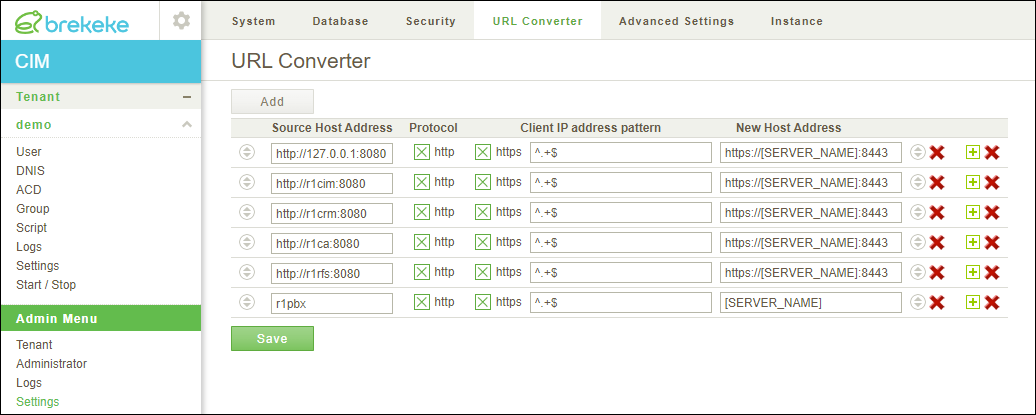
Step 4. Setup URL Converter.
Example 4: URL converter settings on primary site:
<Secondary Site>
Step 1. Select instance state “Standby“, then connect to the replicated database of each application (CIM, CRM, CA, and RFS).
Step 2. Set up internal connection between applcations.
Example: URL for internal connection between CIM and CRM on secondary site.
* The settings of internal connections configured on primary system are not inherited to secondary system, you need to enter URLs for secondary applications.
After setup connections, you can check registered Applications at CIM > [Maintenance] > [Application].

Steps 3. Move to the [Instance] page on each application(CIM, CRM, CA, and RFS). Regarding the each configuration listed at the [For Instance] section, if the secondary system needs unique settings different from primary site, select “Yes” radio button and Click Save.

The configuration items you selected “Yes” become able to be changed on secondary system even though the system status is “Standby”, and the changed values do not affect to primary system.
Step 4. on each application (CIM, CRM, CA, and RFS), update configuration items you set “Yes” at step2.
Example: On CIM, update PBX connection settings to point to the PBX on secondary site.
Example : On CIM, update URL converter for secondary site.
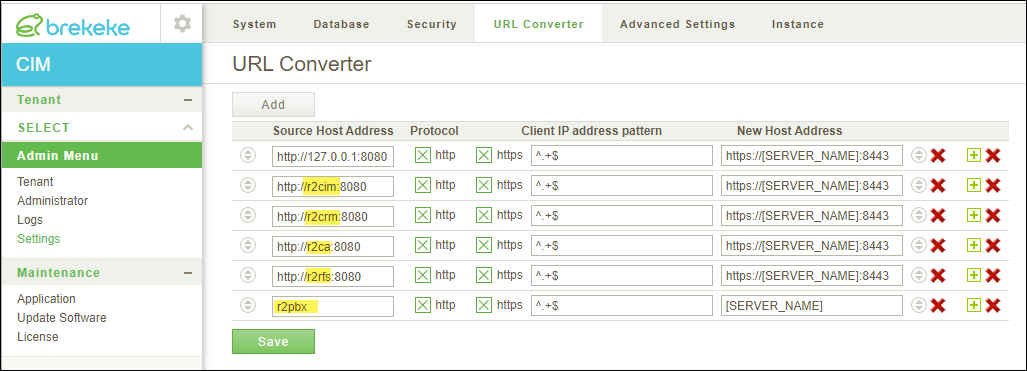
*Reference : URL Converter>>