Brekeke PBX Wiki

  1. Brekeke PBX basic Info
  2. Security
  3. Update & Upgrade
  4. Configuration
    1. Installation
    2. User Management
    3. Brekeke PBX default settings
    4. Network Configuration
    5. Brekeke PBX Administration Tool
    6. Functions Configuration
      1. Processes on Brekeke PBX
      2. Performance optimization
      3. Access Control - System Admin Menu
      4. Tenant Admin Permission
      5. ARS (Automatic Route Selection)
      6. DID
      7. Auto Attendant
      8. BLF, SCA, and Presence
      9. Codec
      10. Voicemail
      11. Back up Brekeke PBX
      12. Callback
      13. Call Forwarding
      14. Call Hold/Call Transfer
      15. Call Hunting
      16. Call Pickup, Call Park
      17. Call Queue
      18. Call Waiting
      19. Conference Call
      20. Confirm Call
      21. Video Call
      22. Fax Support
      23. Flow Selection for a tenant
      24. Paging
      25. Phone ID settings
      26. Ring Group
      27. SRTP Support
      28. Stereo Recording Support
      29. Switching Plan
      30. Three-Way Calls
      31. Tutor Mode
      32. Caller ID from analog (PSTN) phones
      33. Change busy forwarding destination according to response
      34. Change Music On Hold
      35. Rotate Music On Hold
      36. Change recorded audio files destination location
      37. Change RFC2833 Payload
      38. Customize login page for each tenant
      39. Download phonebook info on provisioning
      40. Replace display name
      41. Session Management
      42. Set RTP packet's TOS value
      43. TCP Support
      44. Third-Party Call Control
      45. Microsoft OCS
      46. How to bypass Brekeke PBX
      47. How to create voice files (Fo IVR, Auto Attendant, Guidance) using your phone
      48. WebRTC
      49. Web Phone / Brekeke Phone
        1. Setup Web Phone (Brekeke Phone)
        2. Push Notification Setting for Brekeke Phone
        3. Get Debug Log - Brekeke Phone
      50. Text to Speech
    7. Brekeke PBX Redundancy
    8. Remote Access of Brekeke Heartbeat
  5. Brekeke PAL option
  6. Integration with Zoho Products
  7. Integration with Microsoft Teams
  8. Add-ons
  9. Troubleshooting
  10. Developer's Guides
  11. User's Guide
  12. Version History

Push Notification Setting for Brekeke Phone

Note: Push Notification Gateway Service is provided for Brekeke SIP Server and Brekeke PBX version 3.12 or later.


Step 1. Turn on the Push Notification feature at the [SIP Server] > [Push Notification] > [Settings].


Step 2. In order to use Push Notification Gateway Service, register your product to Brekeke Cloud Management Service at the [SIP Server] > [Push Notification] > [Application]. *1

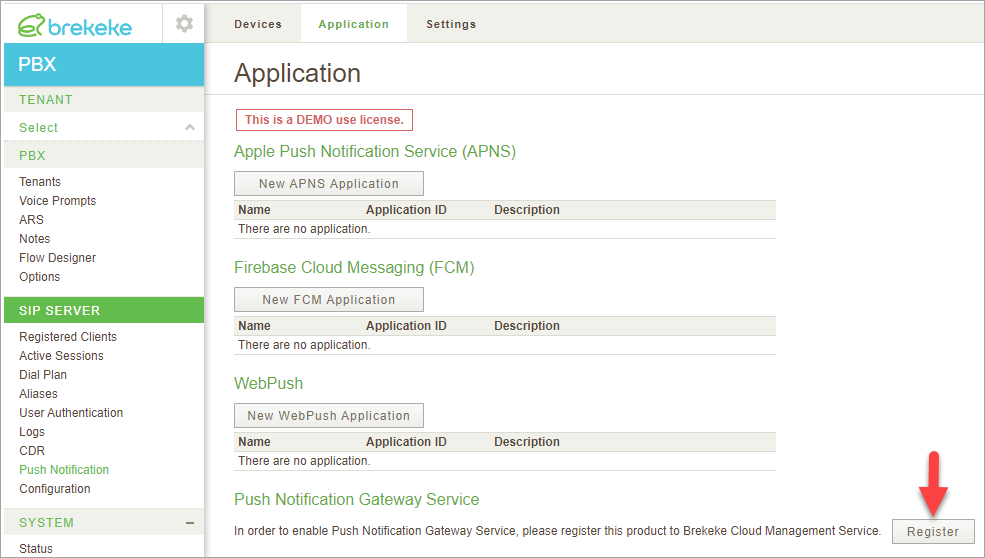
*1. For using Push Notification Gateway Service, the product needs secure internet access to connect to the following site with https.

  • pn.sip-proxy-server.com
  • cloud.sip-proxy-server.com


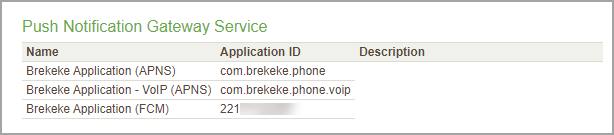
Step 3. If registration is successfully completed. the application IDs are displayed correctly.


Related Link:


Yes No
Suggest Edit